
Shi Shi Beach & Trail
Hiking And Camping Along The Pacific Coast In Olympic National Park

Introduction
A Hidden Paradise
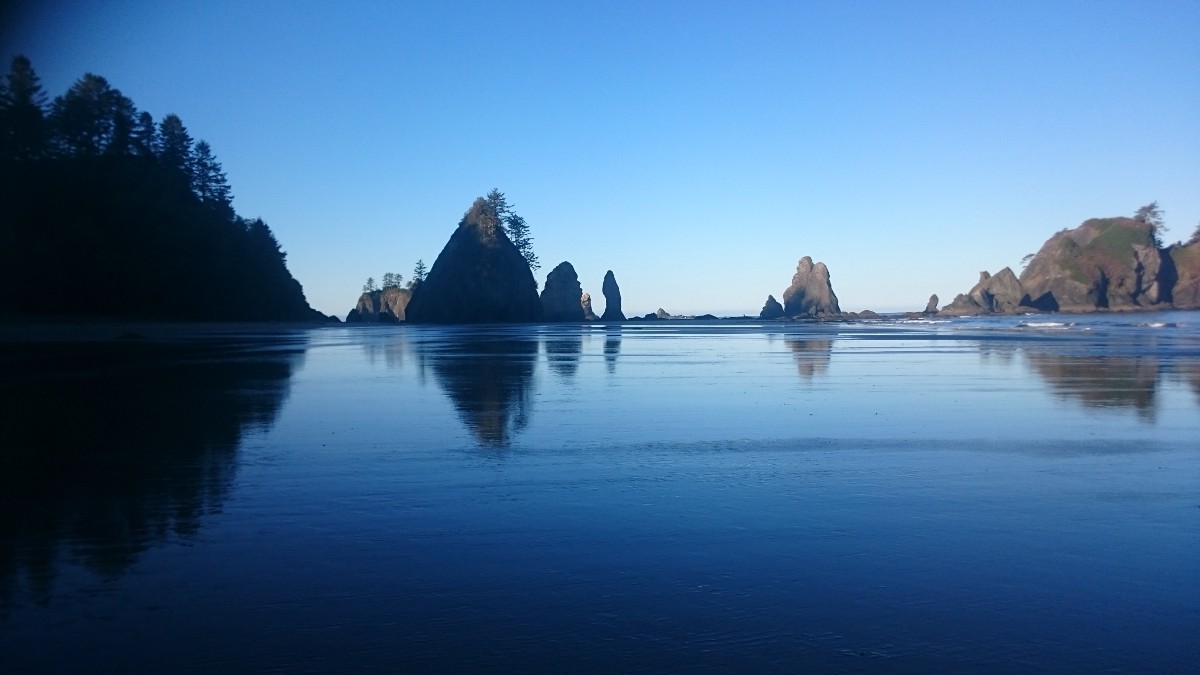
Shi Shi Beach is one of those hidden gems that most people are unaware exists. It’s located in the upper northwest portion of the Olympic peninsula. It consists of a 2.5 mile coast line with tide pools, archipelagos, caves, sea stacks, wildlife, perfect sunsets, pristine stargazing, and more. The journey there is a long one as it’s roughly a 4–5 hour drive by car from the Seattle/Tacoma area. Once at the trailhead it’s about an hour hike to the beach and then another hour or so walk to the south end of the beach to the Point of the Arches. It’s all worth it as this is the best wandering experience we’ve had so far!
We took our trip in late September. The temperature during the day was up in the 70s and at night it dropped down to the mid-40s. It was sunny without any rain and very little fog.
Getting There and What to Know
The Drive, Permits, Parking, and More
Wilderness permit, recreation permit, money for parking, and a bear canister. These are the items you’ll want to square away either before, or along, your journey. It sounds like a lot of info but it’s really not that big of a deal.
The beach itself is part of Olympic National Park. If you’re planning on camping, each person in your group will need a wilderness camping permit which costs $5. (No need for the permit if you’re not camping) You can purchase one at the Olympic National Park Visitor Center in Port Angeles, which is going to be along the route for the majority of people. Last we checked, they were open daily until 4pm. However, it’ll be best to call ahead and verify the hours before your trip.
While you’re at the Visitor Center you’ll also need to check out a bear canister, which is required for overnight stays. Although it’s free they do recommend a $3 donation.
Next up is the Makah Recreation Permit. In order to access the trailhead you have to park on Makah land. They require a $10 pass to be displayed in your window while your vehicle is parked. You can purchase the Makah Recreation Permit in Neah Bay at various locations. The permit is good through the end of the year in which it was purchased.
The final step is parking. If you’re going out for only a day hike you can park at the trailhead parking lot. Overnight parking is not allowed there. So if you’re camping you’ll need to head back down the road about 0.6 miles and park on private property. It’s a residential home and cars are simply lined up and parked on the lawn. When we went the fee was $10 per day, so $20 if you’re staying overnight. (Arrival day is day one, departure day is day two. They made this clear on the sign.) There wasn’t anyone present at the time, just a sign that explained the process which is this: Find a spot to park, walk to the building and grab an envelope, place your money in it (cash only), and write on it the arrival date, departure date, amount of money you placed in the envelope, and your license plate number. Then place the envelope through a slit into a metal box. That’s it. You receive no receipt for yourself, which left us feeling a bit uncomfortable. However, we had no issues and the vehicle was fine when we returned. To save time and energy we, and what most others did, was drive to the trailhead first, drop off all gear and people, have one person drive back and park, then walk back to the trailhead.
Hiking to the Pacific Ocean
Through the Woods We Go
The trail starts out at the day use parking lot. Take note; this was the last opportunity to use a toilet with any privacy. There was toilet paper, but no hand sanitizer and no water as these are vaulted toilets. There were numerous people in the parking lot, some day use folks and several groups of backpackers. The first mile is pretty easy. You’ll cross over boardwalks and bridges. These can be a bit slippery and some of the boards are loose. Be careful. There are two connecting trails along the way which both lead onto private land. These are clearly marked and you shouldn’t have any problem with staying on the trail.
The second mile of the trail is where you’ll encounter a lot of mud and pools of water. Most of it is ankle deep, so wear suitable footwear and you’ll probably want to pack extra socks. There are some side trails which you can use to bypass a lot of the mud but you’ll be going through a lot of brush and your packs may get caught up a few times.
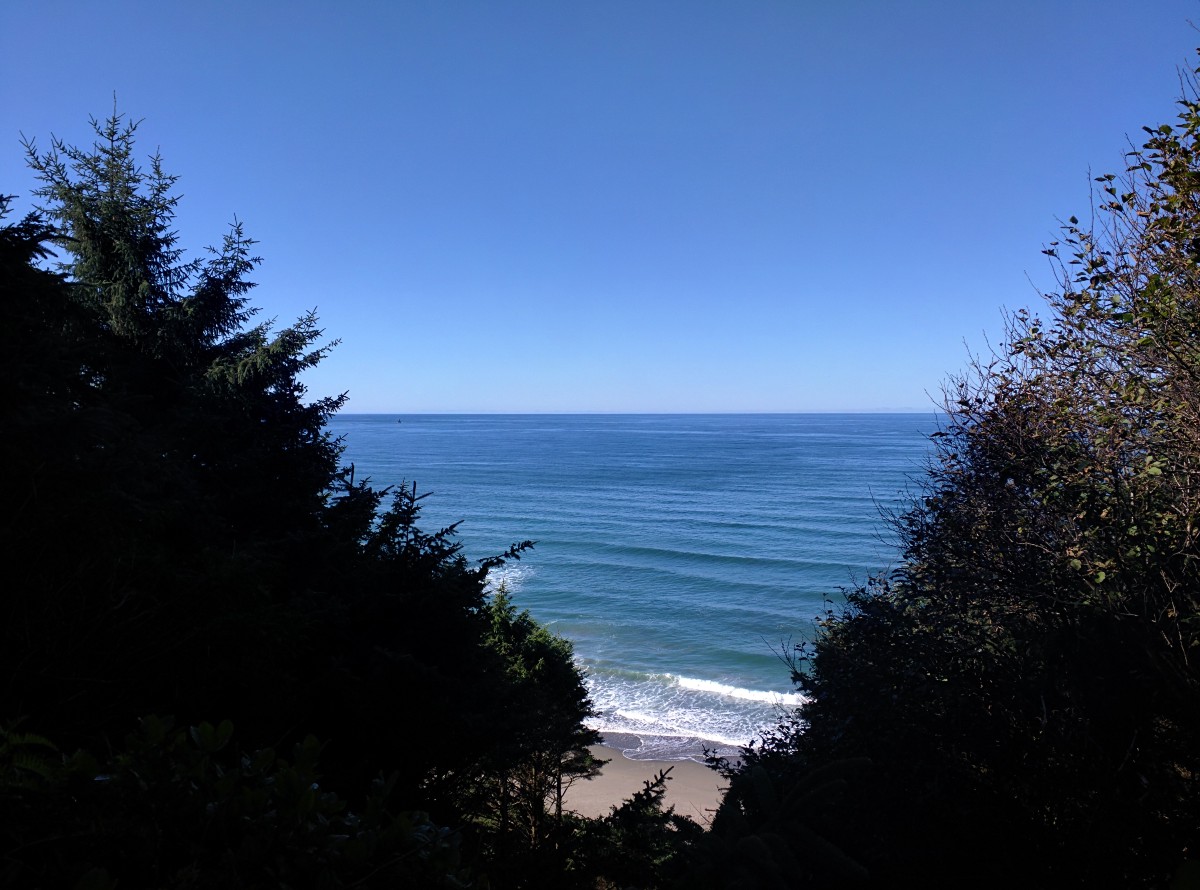
After awhile you’ll be able to hear the ocean in the distance. Look for side trails that lead off to your right for some spectacular ocean views from high above. These are great spots for photos!
Once you’ve reached the last portion of the trail you’ll see a sign indicating that you are now entering into the national park boundaries. From here you’ll descend down a some-what steep cliff of mud and tree roots. Having a backpack, especially a heavy one, adds an extra element of difficulty. The trail kind of goes down in multiple directions and is unclear. Just find the best way down and you’ll be good. There are ropes along this portion for you to hold on to. At the bottom you’ll be lead into a wooded area where the trail continues, parallel to the beach, for a short period. There are multiple openings through here to reach the beach. There is also a vaulted toilet, which has almost zero privacy (literally a toilet bolted over a hole in the ground with some makeshift boards propped up around it). You will need to bring your own toilet paper.
The hike took us just under an hour. However, we were moving pretty fast and did not stop for any photos or breaks the entire time. The majority of other trip reports indicated that most people took around 90 minutes to complete this portion, so plan accordingly.
Setting Up Camp
Choosing a Location for the Night
Now that you’ve reached the beach you can take a break while taking in some amazing views. We opted to find a camp site in the sand nearby the trail exit point. Many other campers decided to continue down the beach further before they setup camp. If fresh water is something you’ll need more of you’ll want to head down another mile or so until you reach the Petroleum Creek. The ranger at the visitor center advised us to boil all water before drinking. However, we brought along four water bottles and a one gallon jug of water so this was not a concern for us.
There was no fire ban while we were there. Bringing your own kindling is allowed, then you must collect driftwood of a particular size (check with the Rangers at the Visitor Center for specifics).
When choosing a site to camp make sure you’re far enough in so high tide won’t reach you. At the visitors center you’ll want to ask for a tide table. Or, if you’re like us, you can just take a look around you to see where everyone else is setting up and then choose a site a little further back and higher than them.
Once you’re all set, take a stroll around. If you’re still near the north end of the beach there are some sea stacks to walk around with a lot of tide pools near them. Here we saw a starfish, anemones, fish, hermit crabs and much more.


Point of the Arches
A Long Walk on the Beach
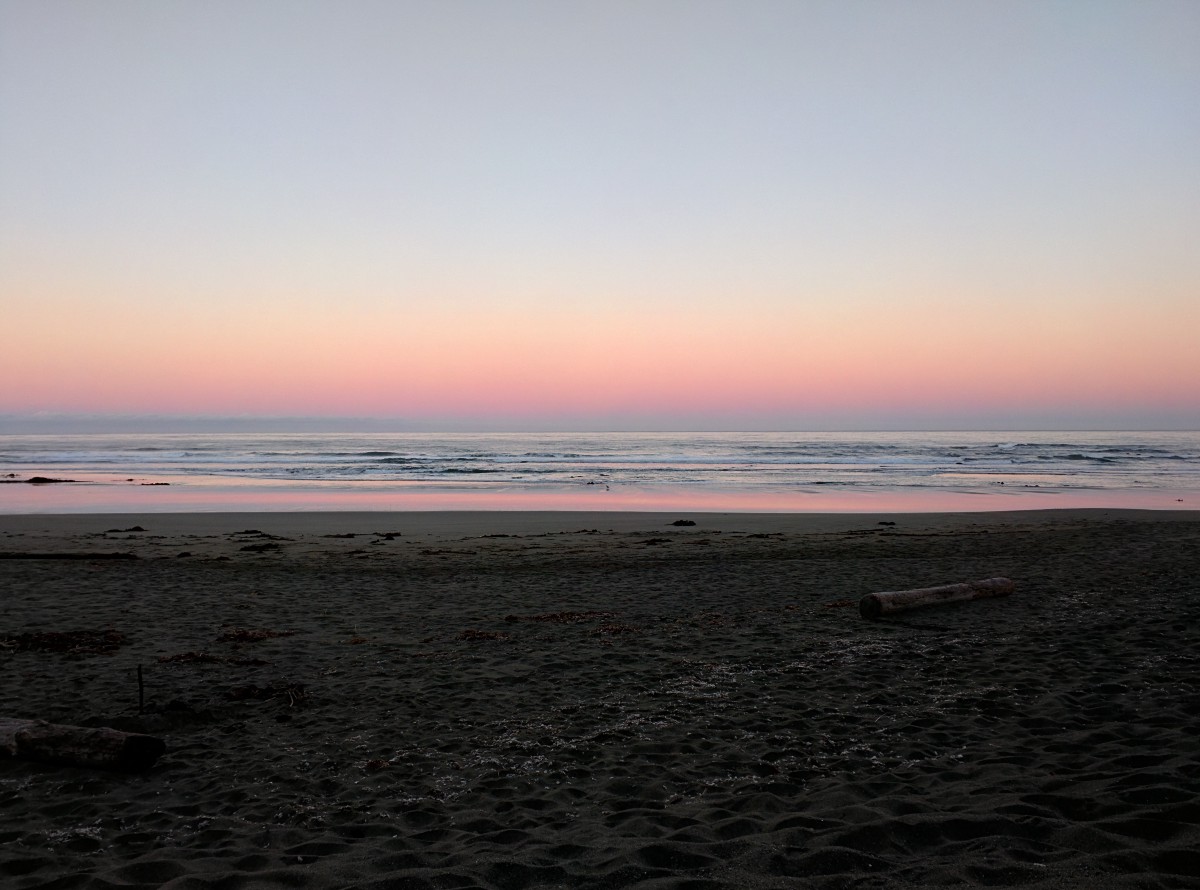
We chose to do this portion the next morning. We woke up just in time to see the sunrise and its pink colors reflect off the water and wet sand. After getting dressed and grabbing a couple of Clif bars, we brought along a bottle of water and headed south along the coast.
There are plenty of things to see on the way. As we walked along sand fleas leapt in all directions at our approach, or maybe they were jumping for joy to have visitors. The high tide line of debris; shells, smoothed stones, kelp, etc made for great beach combing. We had to cross two some-what wide areas of water draining into the ocean. One, and the widest, was the Petroleum Creek. Both of these were a bit tricky to cross if you’re trying to stay dry. Other than that, it was a great walk. The nature of the sand gradually changed to more of a fine gravel as we moved more southward.
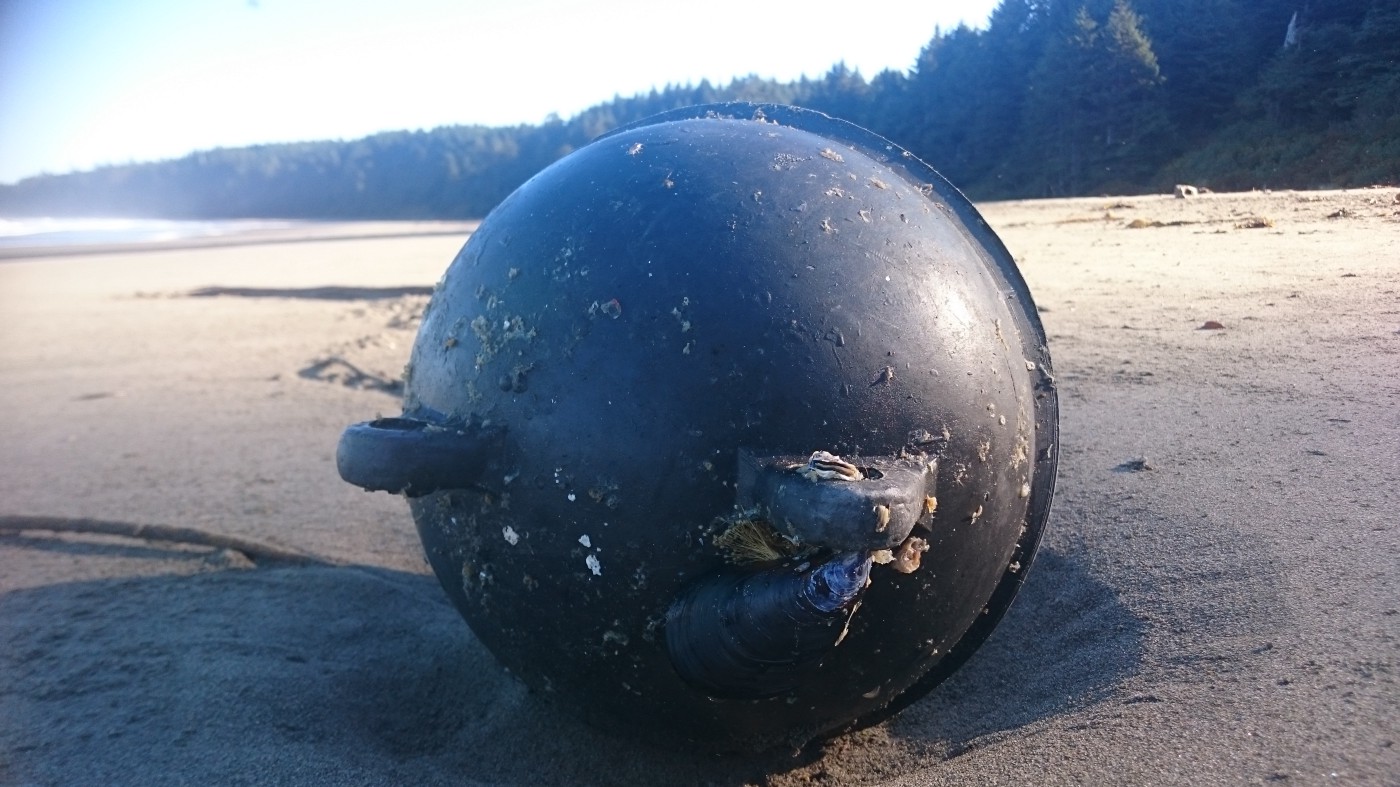
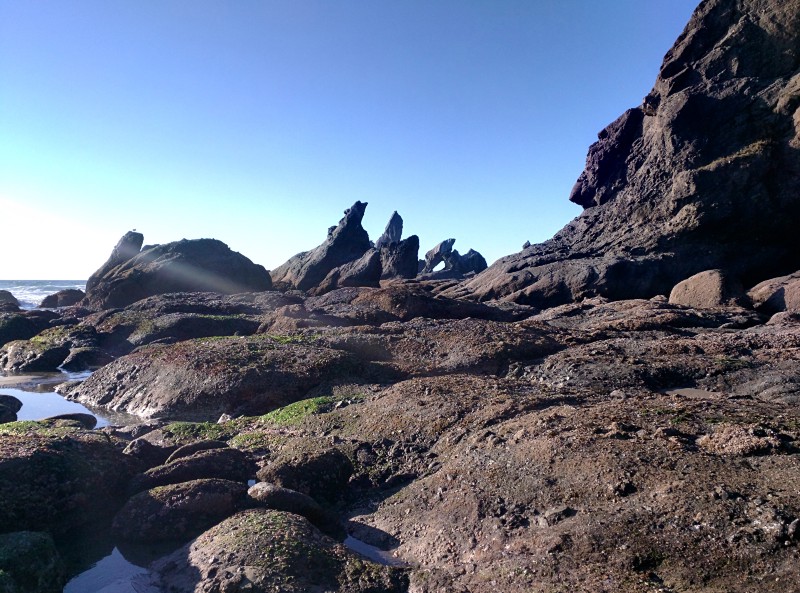
Once we reached Point of the Arches we found numerous bouys, crates, and debris from foreign vessels and lands. Having no geiger counter with us, we opted not to take any souvenirs (Fukushima cast off is still a possibility). There are unusual and interesting rock formations at this end of the beach. Caves, crevices and tide pools present ample areas warranting exploration. We were careful not to walk on any of the exposed rock that contained shellfish, barnacles, or other identifiable living things left vulnerable by the low tide. Do be mindful, the high tide can cut you off from the rest of the beach if you’re not careful here.


Our Final Thoughts
Must Visit!
If you’re coming from the Seattle/Tacoma area this is going to be a long drive for you. We highly recommend making this a two day trip — whether you camp on the beach, or decide to just day hike and stay elsewhere — getting there is going to take a lot and you’ll need some rest before returning. With that being said, YOU MUST GO AND SEE THIS PLACE!!!
Plan around the forecast and try to go during a clear day and clear night. This is not only best for photos but also for stargazing. As a matter of fact, try and go while the moon is not full. There was basically a full moon while me went so the stars weren’t fully showing.
If you’re camping, expect your tent to be covered in dew/mist/sea spray/whatever…. it will be wet in the morning even without any rains. Due to the high cliffs behind you, the sun takes awhile to actually reach the beach in the morning. We moved our tent into the sun, which was much closer towards the water than where we setup, in order for it to dry out.
The temperature can drop quite a bit once the sun has set, so bring layers of clothing. Nothing more miserable than a sleepless, shivery night. Even though we had our tent on the sand, we’d recommend a mat under your sleeping bag for comfort. Hollowing out a place in the sand where you’ll be sleeping might also help. While we didn’t actually see any raccoons, we did see plenty of little footprints, thus the need for the bear canister. We also saw hoof prints around our tent, presumably deer.
We highly recommend this fascinating, wondrous place!
Hey, we appreciate your readership! If you're in the market for new gear and would be willing to make your purchase through our Amazon link, we might get a small commission out of it. No additional cost to you and maybe a little something for us!
Thank you for your support!
Discovered Things
Our Photos


Follow along on our wanderings around the Pacific Northwest.
The only thing better would be being there yourself!
Subscribe to Our Newsletter